Running system on sparcv8leon3-gr716-mini
These instructions describe how to run Phoenix-RTOS on the sparcv8leon3-gr716-mini target. Note that the build
artifacts, including the system image should be provided in the _boot directory. If you have not built the system
image yet, please refer to the Building Phoenix-RTOS image section.
Connecting the board
Connect the board to the computer using a USB cable. The board provides a 4-channel USB-UART bridge, of which three may be used:
- Channel 0 -
if00- used forGRMONdebug connection, interfaces toAHBUART1on the board, - Channel 2 -
if02- used for console, interfaces toUART2on the board, - Channel 3 -
if03- used for interfacing with thephoenixdserver, interfaces toUART3on the board.
Flashing the Phoenix-RTOS system image
The process comes down to a few steps, described below.
Using GRMON to upload Phoenix-RTOS loader (PLO) to RAM
First, check on which port the board is connected to the computer. To do this, run the following command:
ls -l /dev/serial/by-id
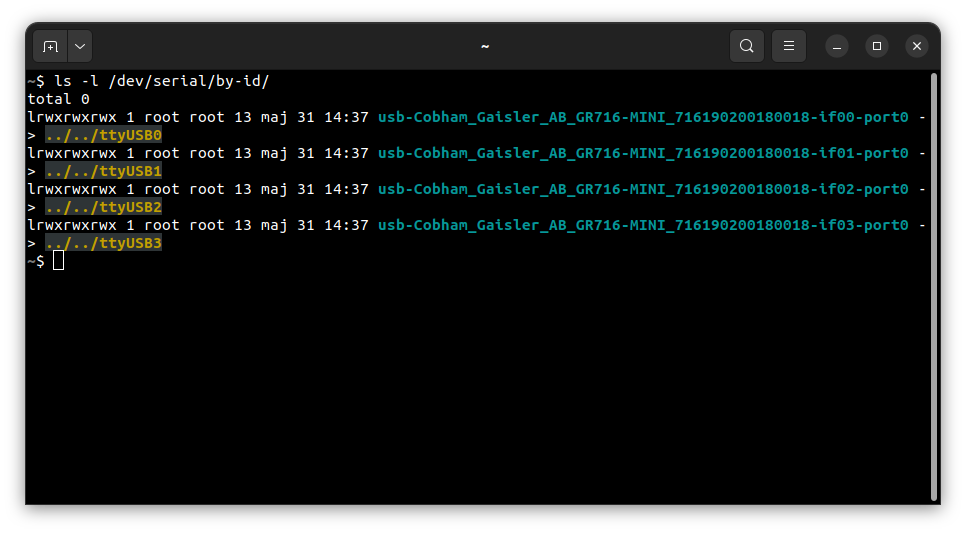
In this case, the debug UART is connected to the ttyUSB0 port.
Launch the GRMON monitor using the following command:
grmon -uart /dev/ttyUSB0 -baud 115200
How to get GRMON
- Download the GRMON software from the official website.
- After downloading the archive, extract it and optionally add the
grmonbinary to thePATHvariable.
The -baud parameter specifies the baud rate of the AHBUART1 interface.
Optionally you can pass the -gdb parameter, which enables the GDB server on port 2222.
Default CPU clock frequency is 50 MHz.
To load the bootloader (plo) to the RAM, run the following commands in the GRMON monitor:
load phoenix-rtos-project/_boot/sparcv8leon3-gr716-mini/plo-ram.img 0x31000000
To verify that the file has been loaded correctly, run the following command:
verify phoenix-rtos-project/_boot/sparcv8leon3-gr716-mini/plo-ram.img 0x31000000
Set the entry point of the bootloader:
ep 0x31000000
Open a new terminal window and run the following command:
picocom -b 115200 --imap lfcrlf /dev/ttyUSB2
This will connect to the UART2 interface, which is used for the console.
To start the bootloader, execute the following command in the GRMON monitor:
go
The bootloader interface should appear in the console.

Copying flash image using PHFS (phoenixd)
To flash the disk image, first, you need to verify to which port the plo serial interface is connected using the
following command:
ls -l /dev/serial/by-id
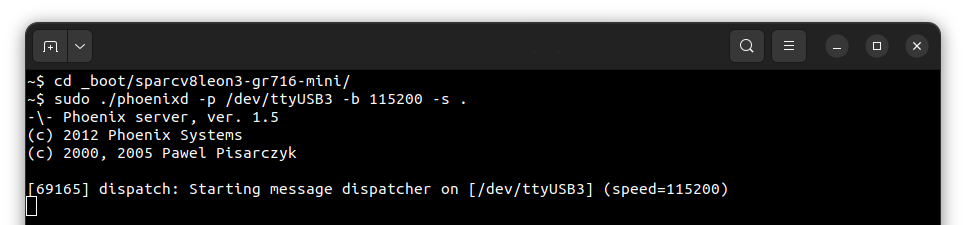
To provide the disk image to the bootloader, phoenixd has to be launched with the following arguments
(choose suitable ttyUSBx device, in this case, ttyUSB3):
sudo ./phoenixd -p /dev/ttyUSB3 -b 115200 -s .
To start copying a file, write the following command in the console with the plo interface:
copy uart3 phoenix.disk flash0 0x0 0x0
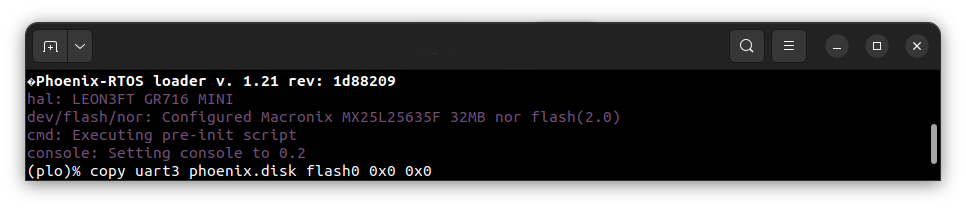
The flash0 is an external flash memory.
To successfully boot from the external flash, BCH error corection codes must be also written to the flash memory.
File containing BCH error correction codes is located in the _boot directory and is named plo.bch.
During system build, address at which the BCH error correction codes should be written is printed in the plo
console, as shown below:

In this case, the file should be written to the address 0xffcb20. To do this, write the following command in the
console with the plo interface:
copy uart3 plo.bch flash0 0xffcb20 0x0
After copying is done, reset the board to start the operating system. To reboot, write reboot command in the plo
console or press the reset button on the board.
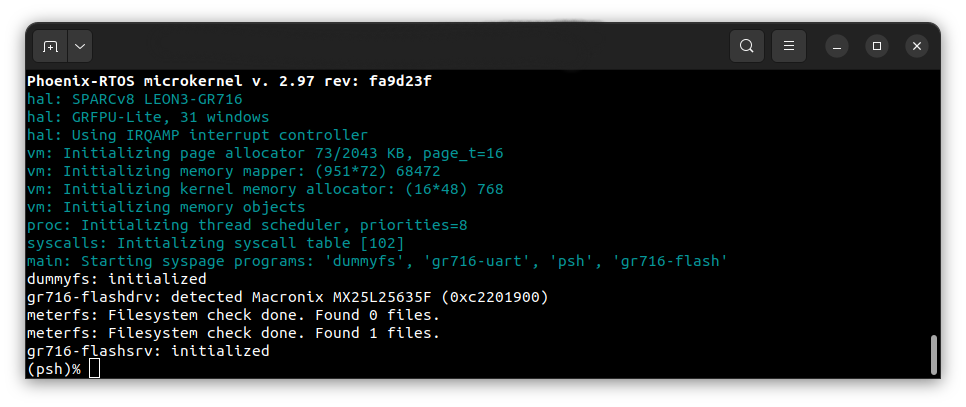
Using Phoenix-RTOS
After reboot, Phoenix-RTOS will be launched and the psh shell command prompt will appear in the terminal.
- Note: You can also enter
ploby pressing any button within some time after reset.
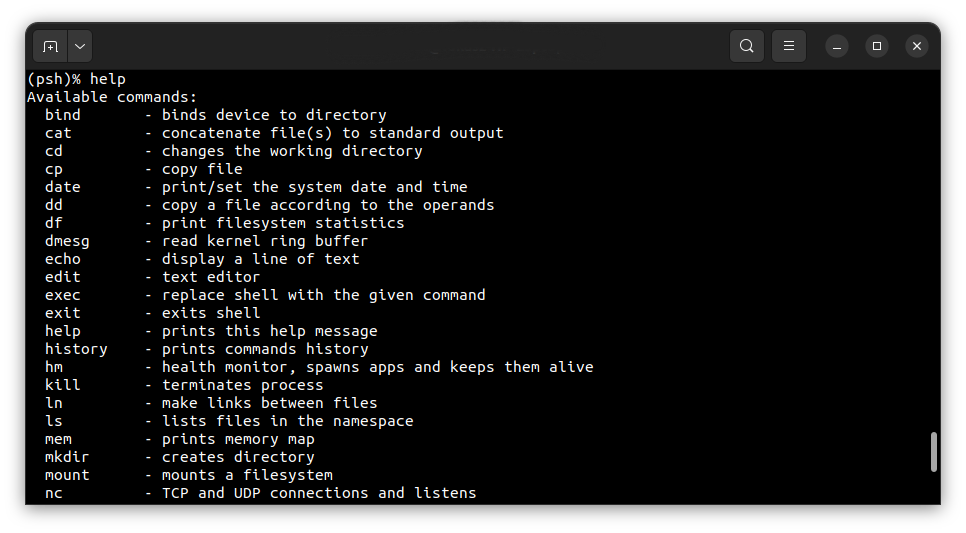
To get the available command list type:
help
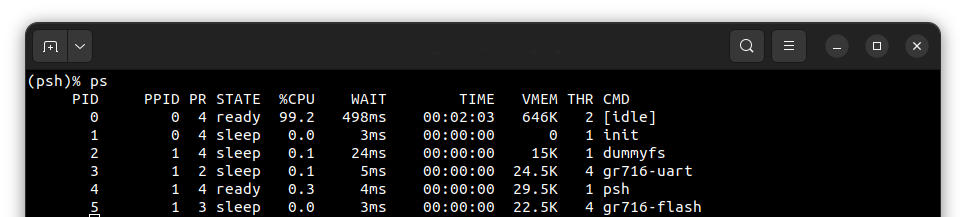
To get the list of working processes type:
ps