Running system on armv7m7-imxrt117x-evk (NXP i.MX RT117x)
This version is designed for NXP i.MX RT117x processors with ARM Cortex-M7 core. To launch this version the final disk
image and loader image should be provided. The images are created as the final artifacts of the phoenix-rtos-project
building and are located in the _boot directory. The disk image consists of the bootloader (plo), kernel, UART driver
(tty), dummyfs filesystem server (RAM disk), and psh (shell). Necessary tools to carry out the flashing process are
located in the _boot directory as well.
See how to build the Phoenix-RTOS system image.
Development board
The easiest way to start programming hardware targets using Phoenix-RTOS is to get some evaluation boards with a specified target processor or microcontroller.
In this case MIMXRT1170-EVK
Is the example of a board with the imxrt117x processor, where the default configuration of peripherals allows running
Phoenix-RTOS.
Connecting the board
-
Firstly make sure, that the
J38jumper is in the3-4position, so that the power will be supplied from theUSB OTGport. It is the simplest way, but the good practice is using a USB hub. You can provide power using an AC adapter and DC connector too (1-2 jumper position). -
To provide a power supply for the board and make flashing possible, you should connect a USB to micro USB cable between your host pc and
USB OTG(J20) of the development board. Do it first. -
To communicate with the board you will need to connect another USB cable, but to
DEBUG USBport (J11). The onboard UART-USB converter is used here.
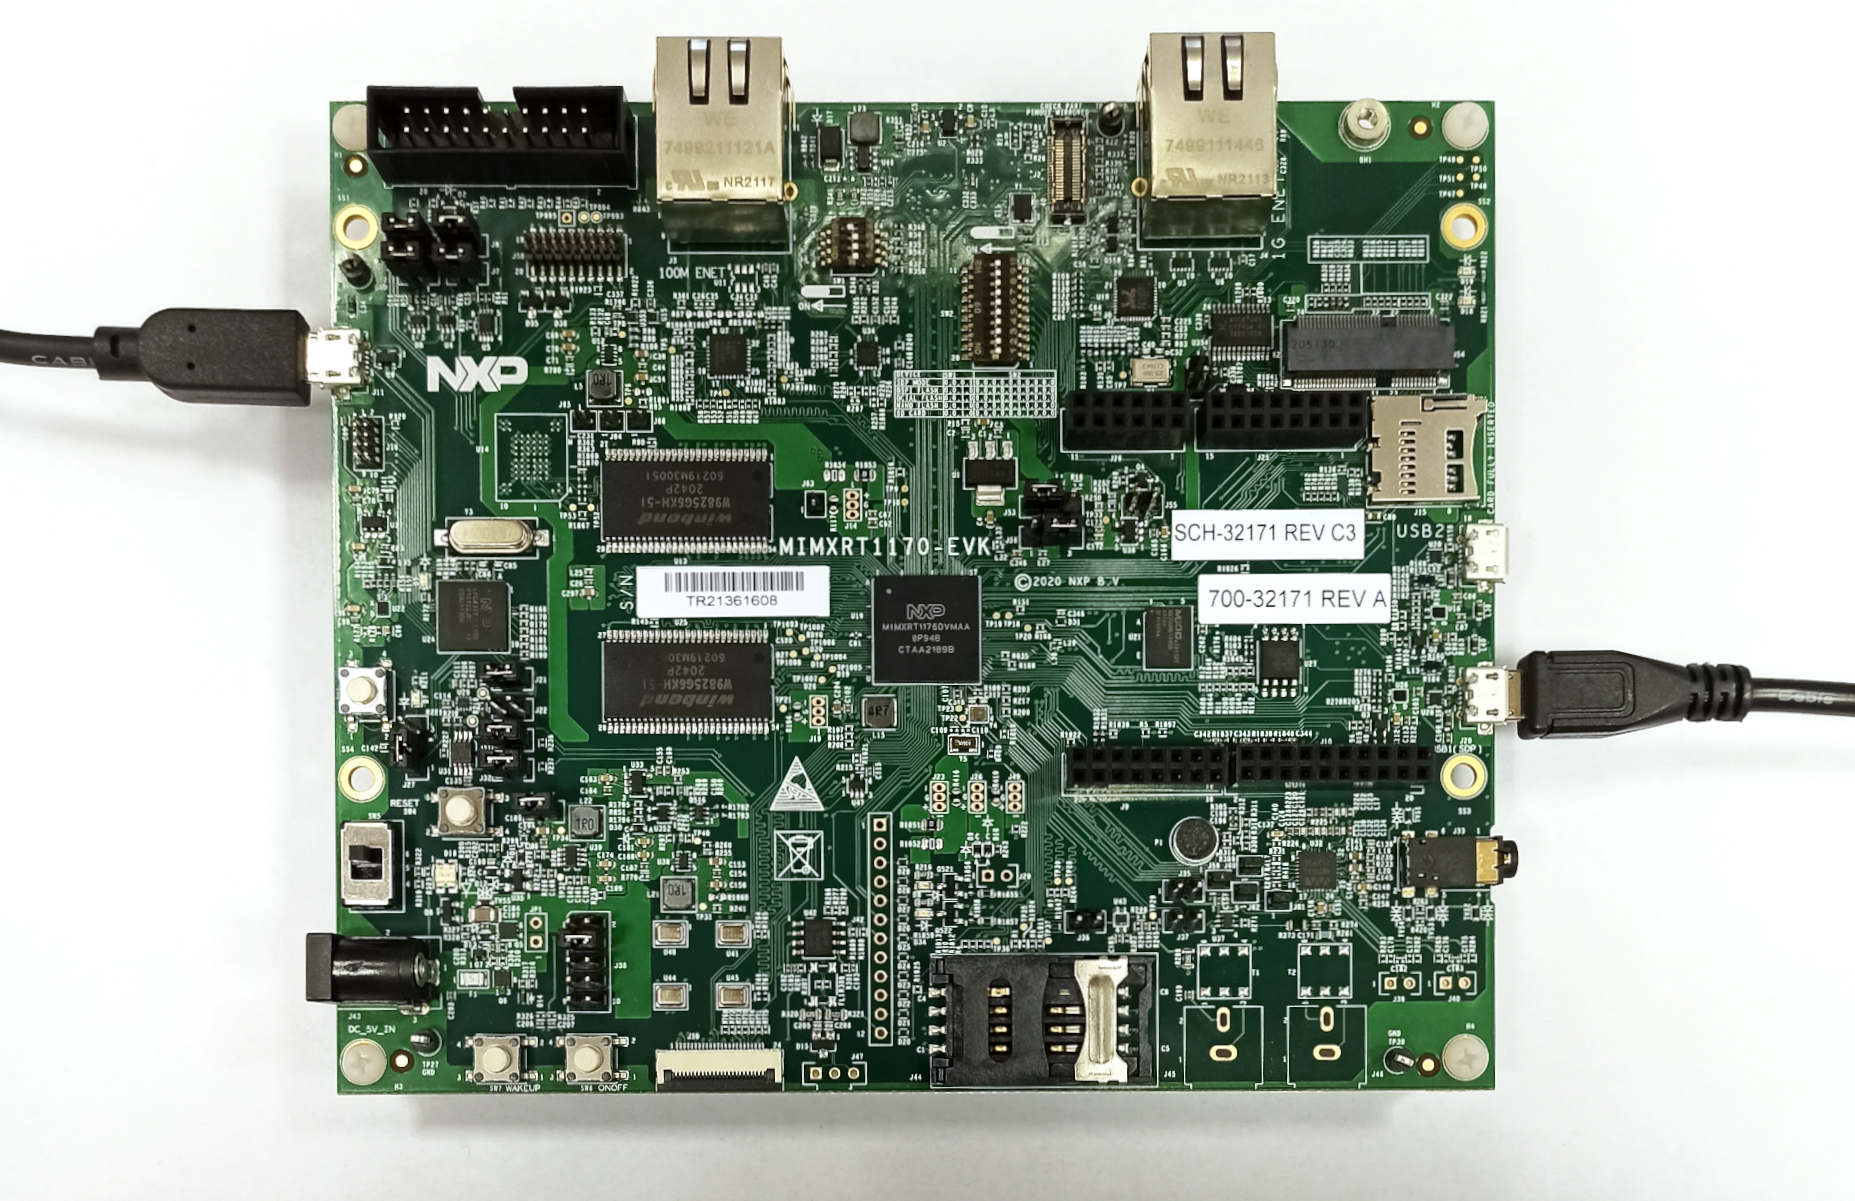
The picture below presents how the board should be connected:
-
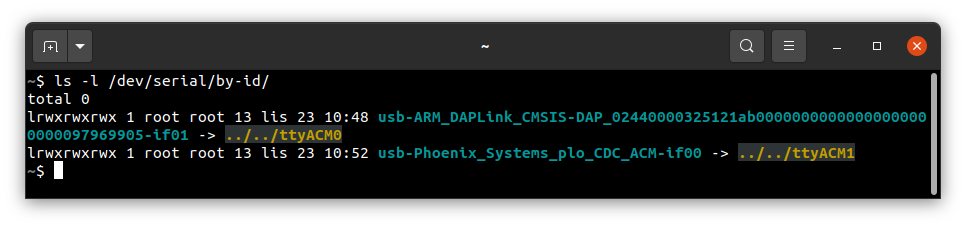
Now you should verify what USB device on your host-pc is connected with the
DEBUG USB(console). In order to check that run: -
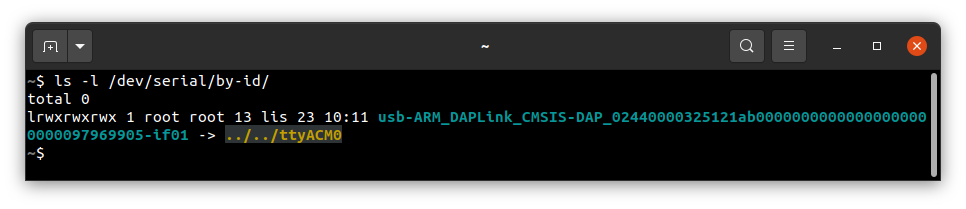
On Ubuntu:
bash
  ls -l /dev/serial/by-id
- On macOS:
bash
  ls -l /dev/tty.*
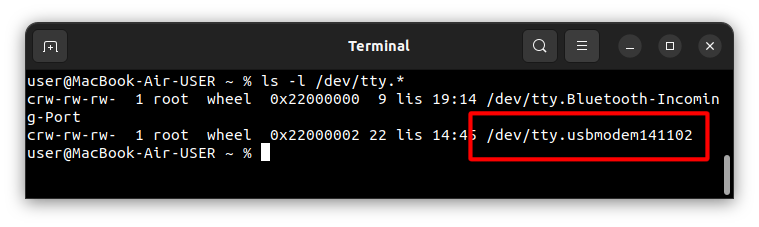
If your output is like in the screenshot above, the console (DEBUG USB in the evaluation board) is on the ACM0
port.
- When the board is connected to your host-pc, open serial port in terminal using picocom and type the console port (in this case ACM0)
bash
  picocom -b 115200 --imap lfcrlf /dev/tty[port]
How to get picocom and run it without privileges (Ubuntu 22.04)
bash
  sudo apt-get update && \
  sudo apt-get install picocom
To use picocom without sudo privileges run this command and then restart:
bash
  sudo usermod -a -G tty <yourname>
How to get picocom (macOS)
bash
  brew update &&\
  brew install picocom
You can leave the terminal with the serial port open, and follow the next steps.
Flashing the Phoenix-RTOS system image
The process comes down to a few steps, described below.
Uploading Phoenix-RTOS loader (plo) to the RAM memory
To flash the disk image to the board, the bootloader (plo) image located in the _boot directory should be uploaded to
the RAM using psu (Phoenix Serial Uploader) via SDP (Serial Download Protocol).
NOTE: i. MX RT1176 should be set in Serial Download mode. Set the appropriate configuration of the SW1 switch on
MIMXRT1170-EVK, which is 0001. If the configuration was different you should restart the board after the
change and open the serial port using picocom once again.
Change directory to _boot and run psu as follows:
cd _boot/armv7m7-imxrt117x-evk
sudo ./psu plo-ram.sdp
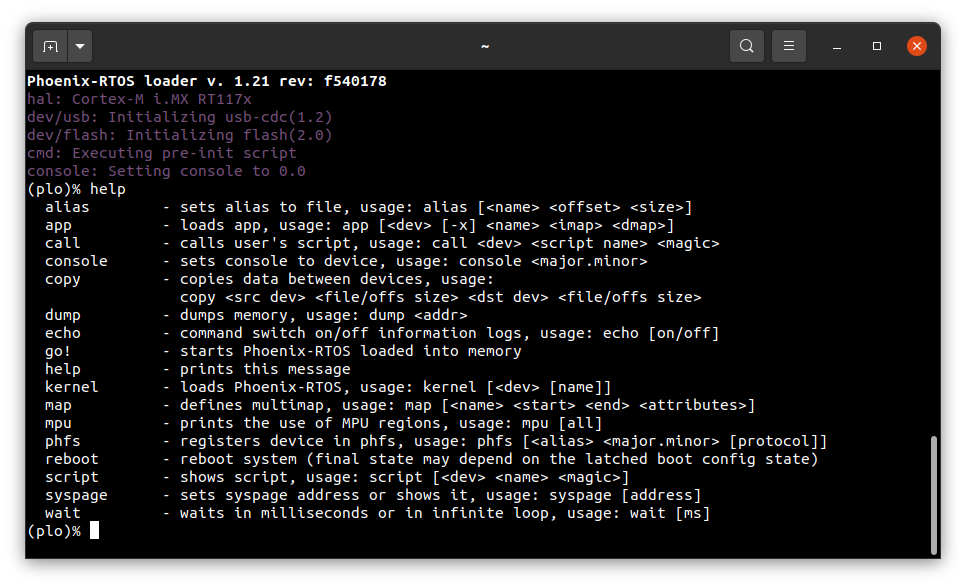
The plo user interface should appear in the console.
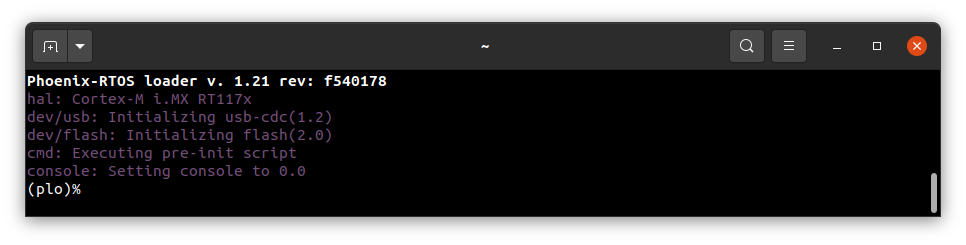
To get the available bootloader command list please type help.
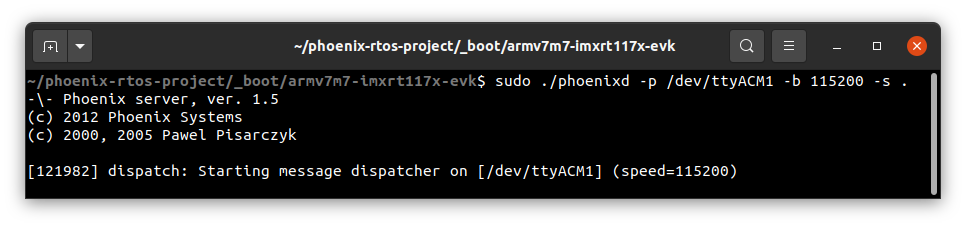
Copying flash image using PHFS (phoenixd)
To flash the disk image, first, you need to verify on which port plo USB device has appeared. You can check that using
ls as follows:
- On Ubuntu:
ls -l /dev/serial/by-id
- On macOS:
ls -l /dev/tty.*

To share disk image to the bootloader, phoenixd has to be launched with the following arguments (choose suitable
ttyACMx device, in this case, ttyACM1):
sudo ./phoenixd -p /dev/tty[port] -b 115200 -s .
To start copying a file, write the following command in the console with plo interface:
copy usb0 phoenix.disk flash0 0x0 0x0
The flash0 is the external flash memory.
Booting Phoenix-RTOS from Flash
To launch Phoenix-RTOS from flash memory, change the SW1 switch to Internal Boot mode (0010 configuration) and
restart the board (you can do it by pushing the SW4 button).
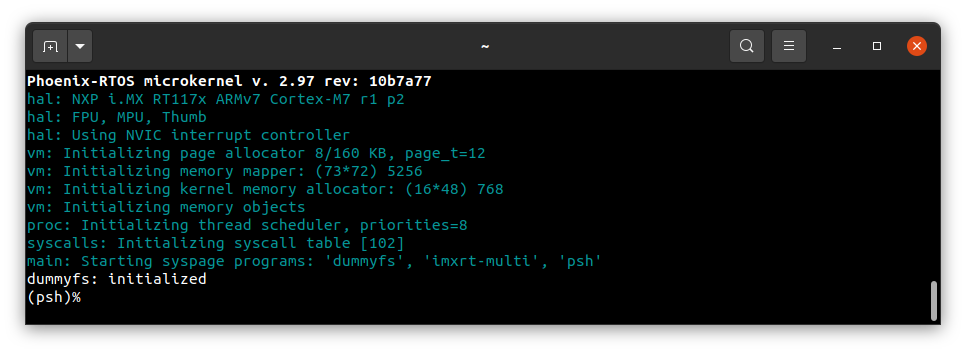
If everything has gone correctly, Phoenix-RTOS with the default configuration and the psh shell command prompt will
appear in the terminal after 2 seconds. If there is a need to enter the bootloader, the waiting for input should be
interrupted by pressing any key. Then you can exit plo by passing go! command.
Using Phoenix-RTOS
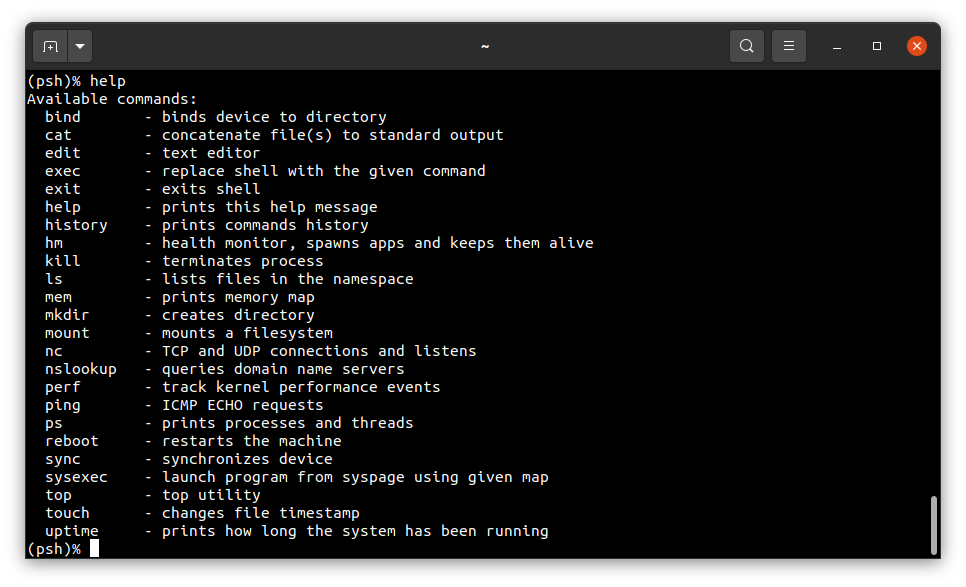
If you want to get the available command list please type:
help
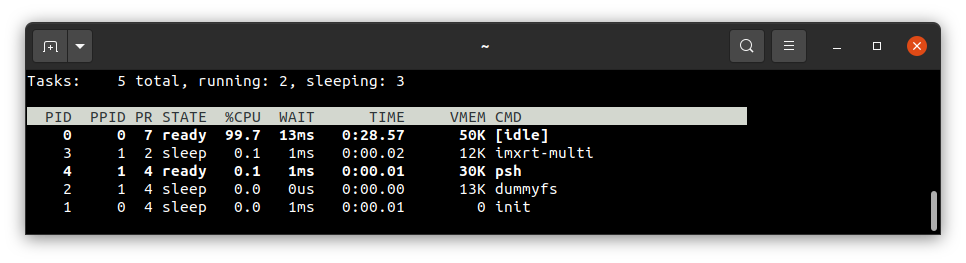
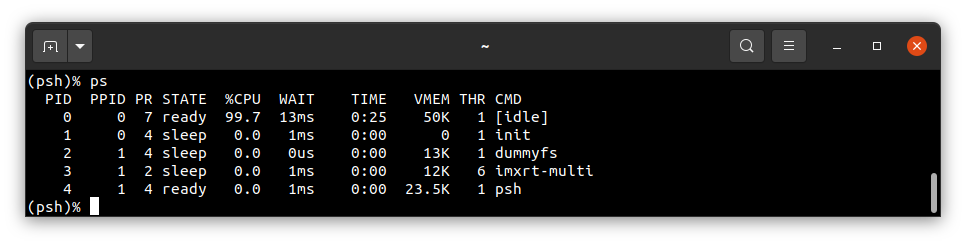
To get the list of working processes please type:
ps
To get the table of processes please type:
top